This is not a typical blog post of mine. It’s just a note to self. See, I realized my blog is actually the best format I have to save a long-form note with code snippets, so I’m just going to use it to remember how I set up a private VPN for my wife to watch This Country on the BBC iPlayer, in case I ever need to do it again.
If you find yourself here because you also want to stream content from other countries or blacked-out regions without subscribing to some VPN service, feel free to follow along. If not, please ignore this post and have yourself a nice day.
The back story, if you care
My wife said she wanted to watch a show called This Country on BBC. The first two seasons of the show are freely available in the US on their website, but for some reason the third season is blacked out for people outside the UK. She also wanted to watch it on an iPhone or iPad, and I didn’t want to pay some random, shady VPN service that might be blocked from accessing the BBC website anyway. So those were the requirements.
Since I’m a software engineer I figured it wouldn’t be too hard to set up a personal VPN for a few bucks and then turn it off when my wife finished watching the show. And, I was right. It only took four steps. Here’s the executive summary on how I did it:
- Spin up a server in the UK, using a pay-by-the-hour service like Digital Ocean
- Follow instructions for how to set up a Squid proxy on that server
- Get a little inventive with your configuration to circumvent some basic security checks
- Connect your device to that server, create a BBC account, and stream away
This took me a few hours total to figure out and implement. But now that I know how, it would only take me a few minutes to do it again. The total cost was something like $0.70. And this should work with almost any streaming service that checks your location via your IP address, like MLB or NBA or NFL blackouts.
Please note this worked for me in mid-February 2023. The farther you are in the future from that date, the more likely the instructions are to be slightly out of date, or for the streaming sites to have wisened up and blocked more kinds of traffic; so, in short, the less likely this trick is to work.
But anyway, here are the instructions that worked for me. Good luck.
You’ll need three things for this: (1) A **Server**, which will be the thing you pay a hosting provider for that will run the VPN. (2) A **Home Computer**, which is how you’ll test things out and access the server, and (3) A **Device** to watch the content on (obviously!). Your **Device** could also be your **Home Computer**.
1. Spin up a server in the appropriate region
The first thing you need is a physical server in a place that is allowed to watch the content you want. You’ll be receiving all the streaming content to that server, then forwarding it on to your device. That’s the basic premise here. So I recommend you spin up a cheap server on some provider like Digital Ocean that lets you choose where that server is located:
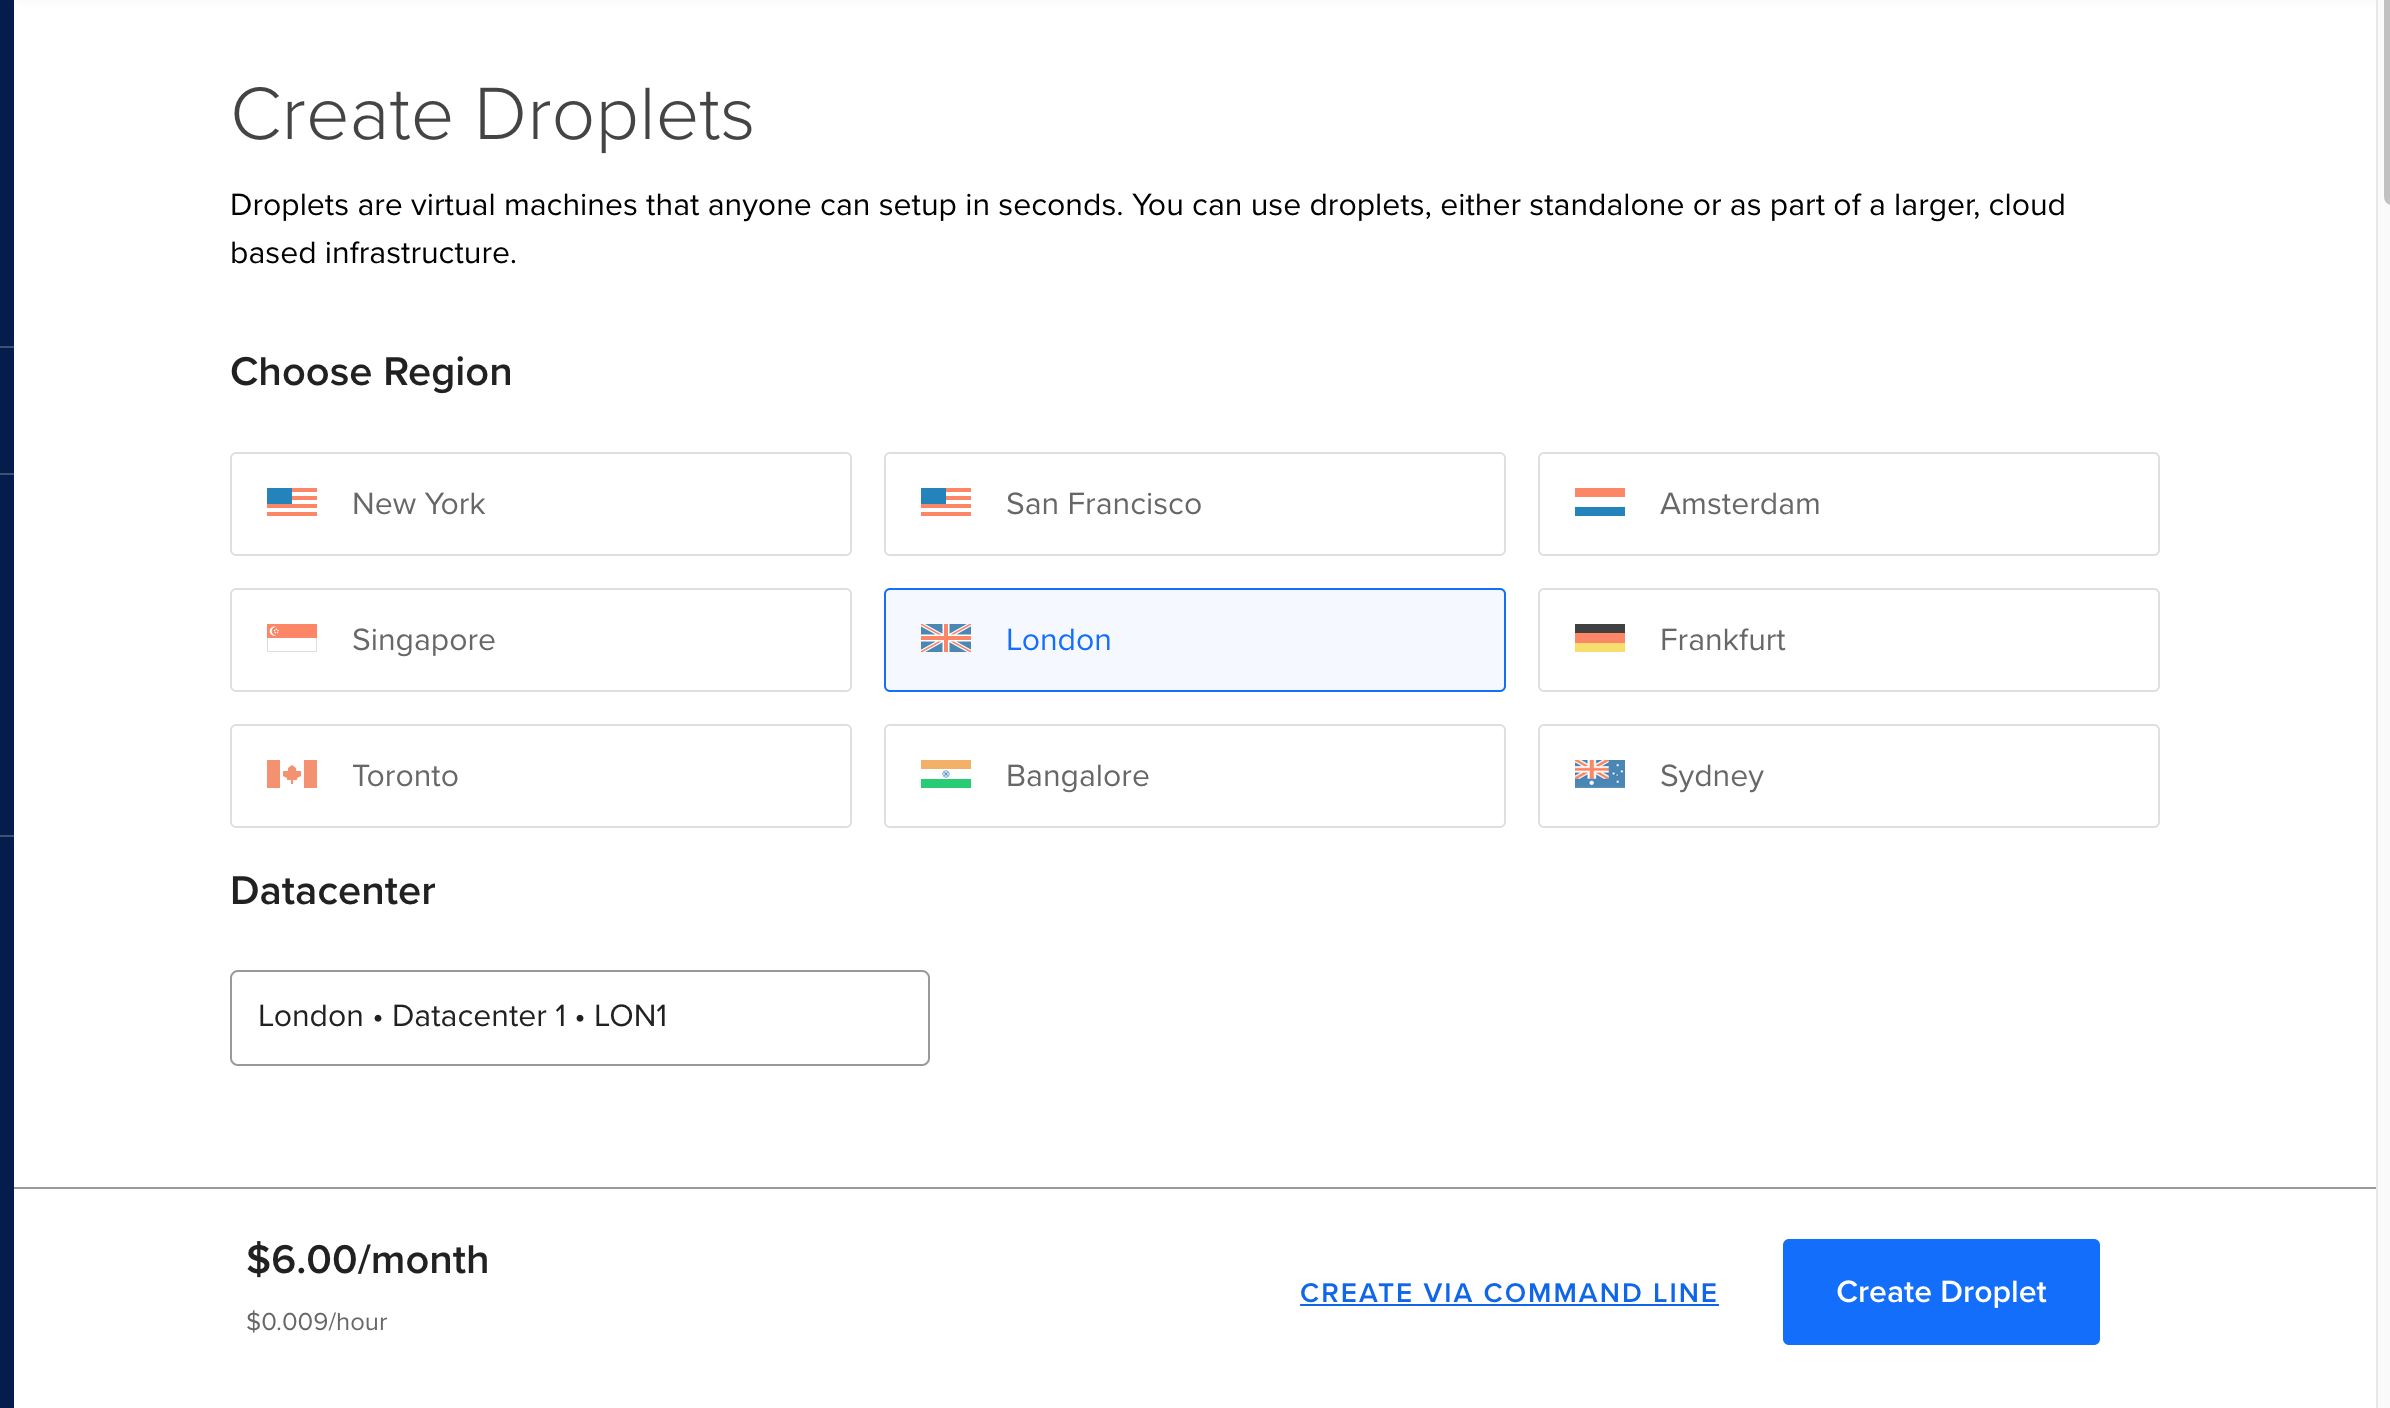
Digital Ocean lets you create servers (called “Droplets”) in a bunch of different regions; I chose London. Within a few seconds my server, which was $0.009 an hour and came with 1000 GB of free data transfer, was ready. And you can delete the server anytime you want and they only charge you for the hours you had it running. Pretty neat.
For this exercise I chose the Ubuntu 22.04 Linux server, so all of the following instructions will be for that kind of machine. You will need to access this machine as the root user, which you can do from your terminal or from their web interface.
Once you’re in your new server as root, let’s get a few key pieces of information together, which will help us later. First, run this command from your server:
# curl ifconfig.me/all
You’ll see output like this:
# curl ifconfig.me/all
ip_addr: YOUR.SERVER.IP.ADDRESS
remote_host: unavailable
user_agent: curl/7.81.0
port: 51400
language:
referer:
connection:
keep_alive:
method: GET
encoding:
mime: */*
charset:
via: 1.1 google
The important part is the ip_addr line. This is your server’s IP address, so write that down or just keep it in mind. Now, run the same command on your Home Computer. The curl command is built in to the Terminal app on Mac and Linux machines, and I think it’s available on Windows machines in the Command Prompt app. The resulting ip_addr is your home IP address—the one the streaming site is blocking—so keep that in mind too.
2. Create a Squid proxy
Okay so maybe it’s not technically called a “VPN”, I’m not sure, but a proxy does what we want it to do: It relays all of your web traffic so the streaming site thinks you’re somewhere else. And Squid is a free, open source proxy we can install quickly and easily. It also seems to handle streaming content just fine. So let’s install that on our server:
# apt update
# apt install squid
Next we need to edit a few lines in the Squid config to allow our home devices to talk to the server, but ONLY our home devices. You’ll need your home IP address from above. You’ll also need to edit a file on the server using a command line editor like VIM or nano.
# vim /etc/squid/squid.conf
You’ll want to find the lines, around line #1550 or so, that look like this:
# INSERT YOUR OWN RULE(S) HERE TO ALLOW ACCESS FROM YOUR CLIENTS
#
include /etc/squid/conf.d/*

# Example rule allowing access from your local networks.

# Adapt localnet in the ACL section to list your (internal) IP networks
# from where browsing should be allowed
#http_access allow localnet
http_access allow localhost

# And finally deny all other access to this proxy
http_access deny all
.. and edit them to add your own home IP address to an acl named localnet, then allow access to that localnet.
# INSERT YOUR OWN RULE(S) HERE TO ALLOW ACCESS FROM YOUR CLIENTS
#
include /etc/squid/conf.d/*

# Example rule allowing access from your local networks.
acl localnet src YOUR.HOME.IP.ADDRESS

# Adapt localnet in the ACL section to list your (internal) IP networks
# from where browsing should be allowed
http_access allow localnet
http_access allow localhost
When that’s done, you’ll restart Squid:
# systemctl restart squid.service
Then, allow traffic through Squid’s default port:
# ufw allow 3128
(You can just run these as root by the way. It’s fine.)
If you want more info on how all this works you can read the full instructions here, but they contain a couple small mistakes and also walk you through setting up password security. I just took the important parts and simplified them to work for the root user, so, up to you.
Now you should have your VPN running and it should allow your computer talk to it. Let’s check from your Home Computer.
$ curl -v -x http://YOUR.SERVER.IP.ADDRESS:3128 ifconfig.me/all
This curl command sends your HTTP request through your Server. Check your output… You should see your server’s IP address in the ip_addr. Congratulations, you have set up a working proxy.
3. (A) Configure Squid to be sneakier
For some services, like MLB At-Bat, you don’t need to do any other config changes, and you can skip right to step 4 below and watch your content. But for BBC and probably a ton of other streaming sites you’ll need to get slightly craftier. Notice this line in the output of the curl command you just ran:
via: 1.1 ubuntu-s-1vcpu-1gb-lon1-01 (squid/4.10), 1.1 google
Yes, your default Squid server is sending along proxy information with its request. Basically, it’s a snitch. Some streaming sites know this and then block you. So let’s tell Squid not to do that. You’ll need to edit your Squid config on your Server again (remember, it’s at /etc/squid/squid.conf):
First, find the via option, which is around line #5520 and looks like this:
#  TAG: via     on|off
#       If set (default), Squid will include a Via header in requests and
#       replies as required by RFC2616.
#Default:
# via on
… Uncomment it, and turn it off.
#  TAG: via     on|off
#       If set (default), Squid will include a Via header in requests and
#       replies as required by RFC2616.
#Default:
via off
Lastly, find the forwarded_for option, around line #8646:
#       If set to "delete", Squid will delete the entire
#       X-Forwarded-For header.
#
#       If set to "truncate", Squid will remove all existing
#       X-Forwarded-For entries, and place the client IP as the sole entry.
#Default:
# forwarded_for on
…Uncomment, and set that to delete:
#       If set to "delete", Squid will delete the entire
#       X-Forwarded-For header.
#
#       If set to "truncate", Squid will remove all existing
#       X-Forwarded-For entries, and place the client IP as the sole entry.
#Default:
forwarded_for delete
Now save and restart Squid again:
# systemctl restart squid.service
Once that’s done, run the curl command from your Home Computer again to confirm the via line no longer includes proxy info:
ip_addr: YOUR.SERVER.IP.ADDRESS
remote_host: unavailable
user_agent: curl/7.54.0
port: 42080
language:
referer:
connection:
keep_alive:
method: GET
encoding:
mime: */*
charset:
via: 1.1 google
All good!
3. (B) (Optional) Acquire and configure a reserved IP address
At this point I recommend skipping to step 4 and trying to access the content. There’s a good chance it’ll work. However, I found I was still, somehow, being blocked by the BBC. My best guess is my Digital Ocean server’s IP address is on a list somewhere. A list called These Might Be VPNs So Don’t Let Them Watch Things. So I spent the extra few minutes and configured a “reserved IP address” for my server… It’s free and provided me an individual IP address that is less likely to be on those kinds of lists.
If you try step 4 and it is still blocking you, come back here and try the reserved IP trick. Here’s how you do it.
First, in your Digital Ocean panel, enable the reserved IP:
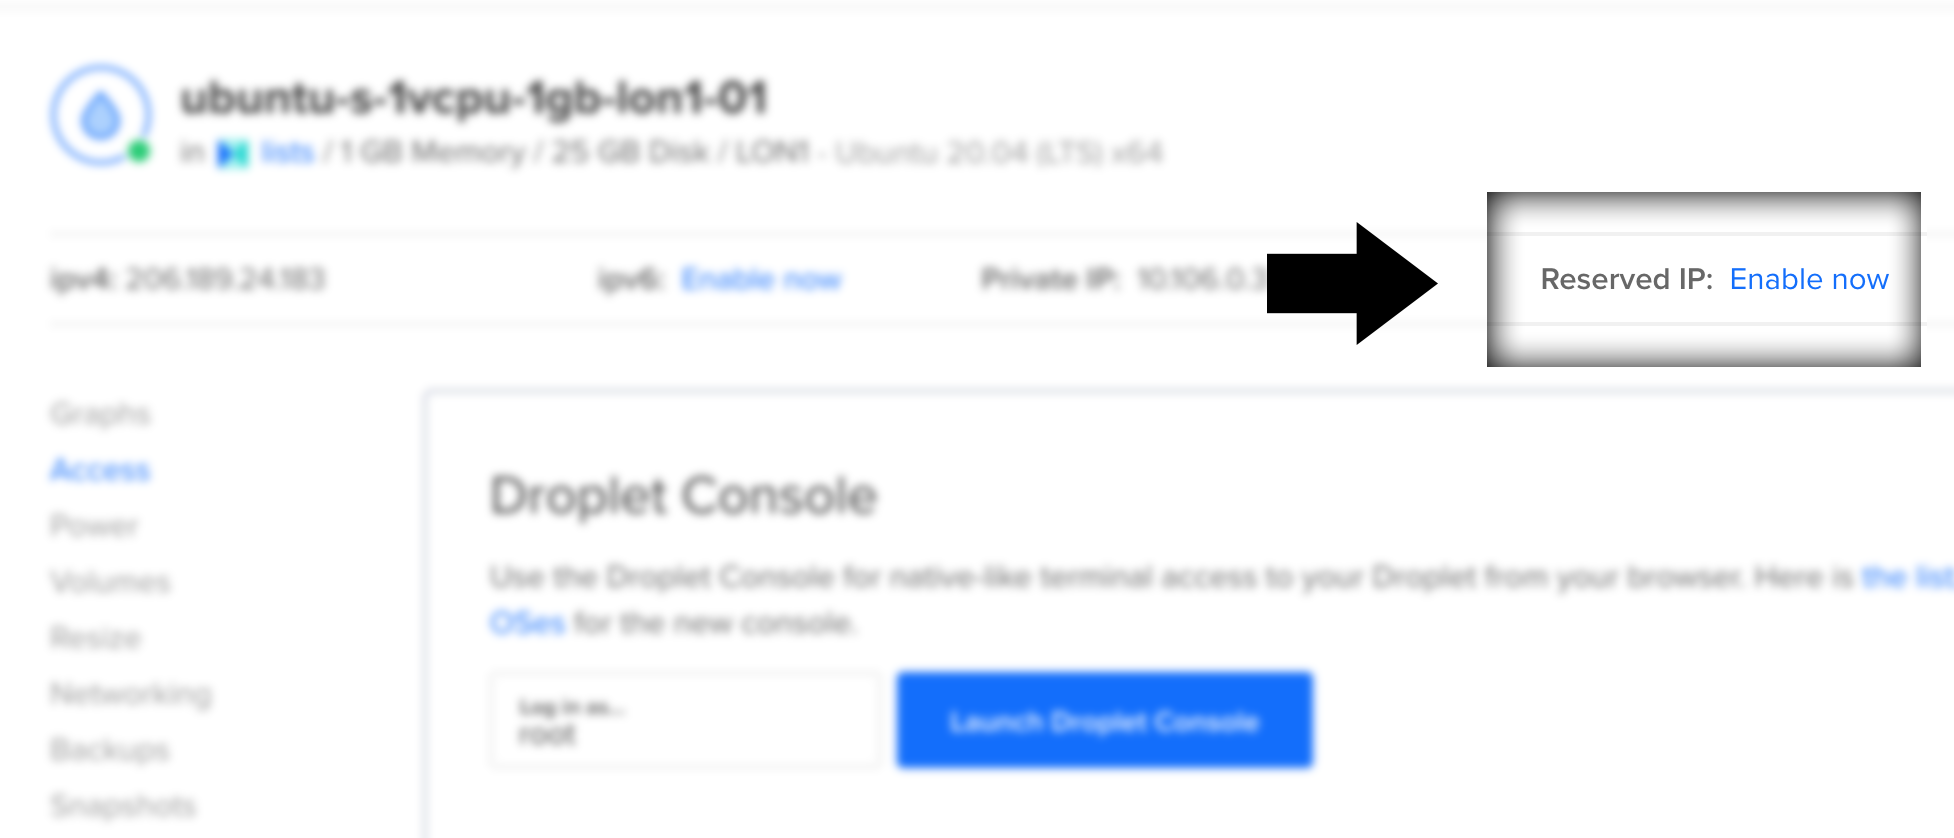
It should be ready in a few seconds. Then, logged in to your Server, configure it to use this new IP address as the default address for outgoing traffic. The official documentation for that is here, but I just used the following two commands:
First, find your server’s “anchor IP” which can be found by running this special command from your server (it does some Digital Ocean magic in the background I guess):
# curl -s http://169.254.169.254/metadata/v1/interfaces/public/0/anchor_ipv4/gateway
This should return an IP address. Then, take that IP address and run this command:
# sh -c "ip route del 0/0; ip route add default via THAT.ANCHOR.IP.ADDRESS dev eth0"
And that’s it. Run the above curl command one more time from your computer, this time using your reserved IP address:
# curl -v -x http://YOUR.RESERVED.IP.ADDRESS:3128 ifconfig.me/all
And you should see your reserved IP as the ip_addr and no via headers that give away your home IP address. You’re done!
4. Connect your device to the server and go
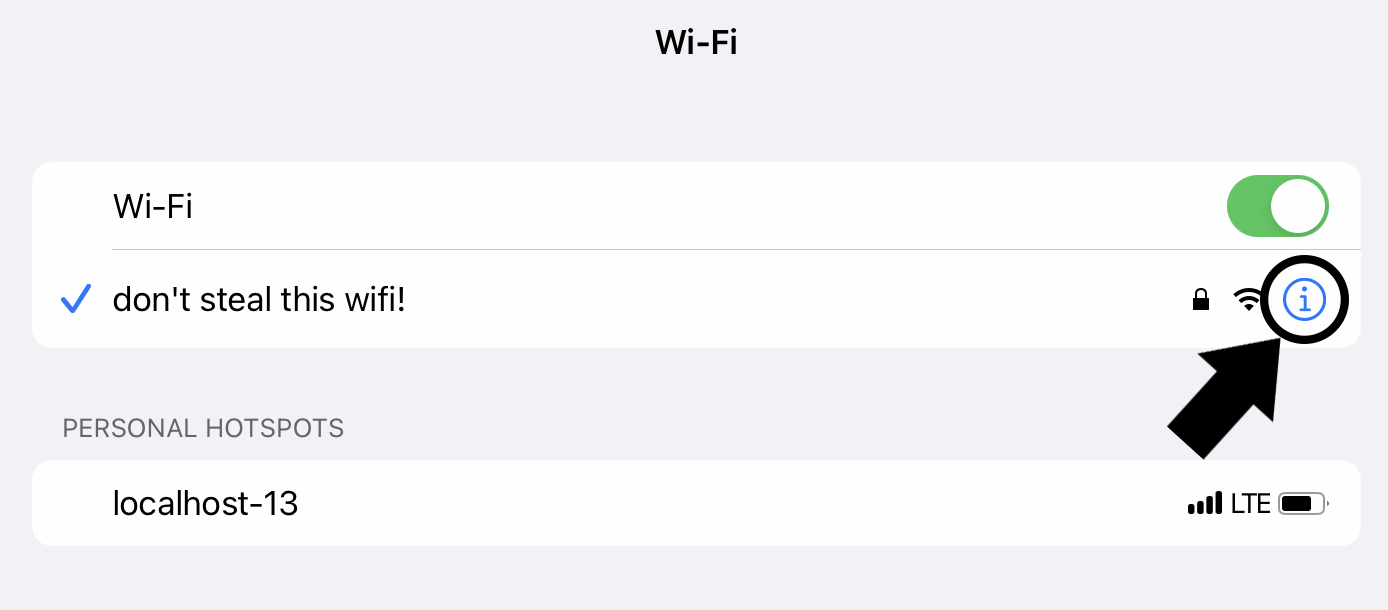
The last step is to connect your mobile device, or whichever Device, to your server. I’m going to give instructions for how to connect iPads/iPhones, but all devices can use the VPN you set up, you can just Google how to connect that device to a proxy.
First, on your Device go to your network settings for your wifi network:
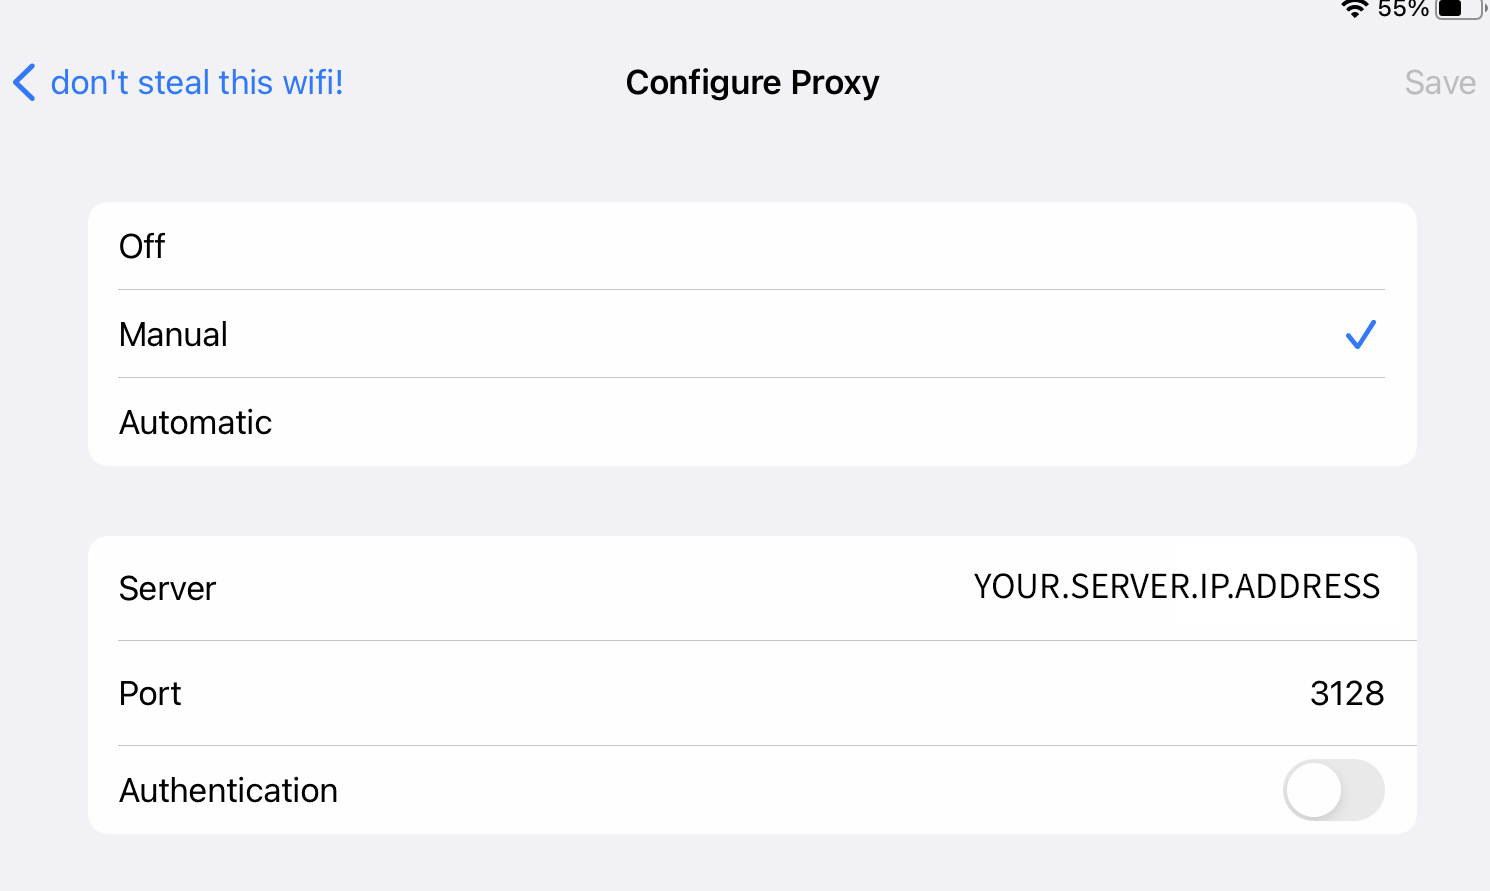
Then, at the bottom, go to HTTP Proxy > Configure Proxy:
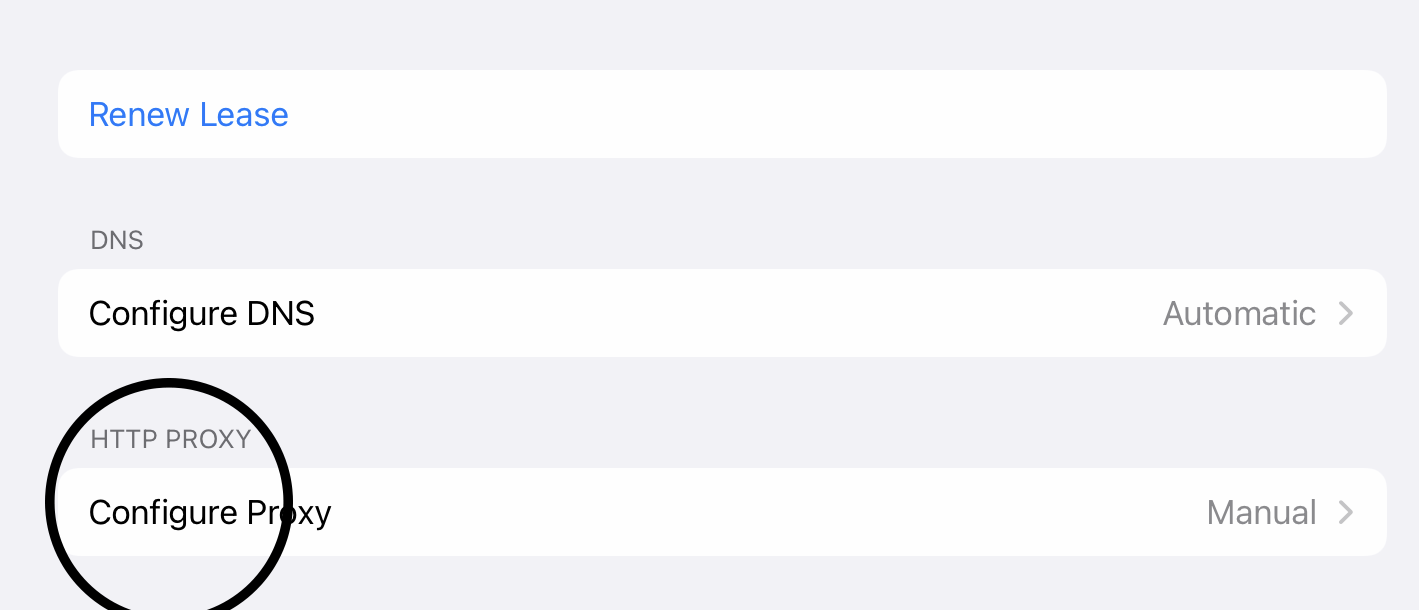
Select “manual”, then enter your Server’s IP address (or reserved IP address, if you made one in step 3), and port 3128:
And that’s it. Now visit a website like whatismyipaddress.com from your Device to confirm: The Internet thinks you’re wherever your server is.
Now head to the BBC website and sign up for an account. You might want to do this all in a private browsing tab, or clear your cookies, since maybe the last time you visited they tagged you as Not Allowed To Watch Things. When you sign up it’ll ask you for a UK postal code (you can Google one, or just use NW1 0AU). Then, lie about having a “TV Licence”, whatever that is, and there you go. Your content is now free to stream.
Troubleshooting
If your server stops sending your traffic
If the curl commands above stop working from your Home Computer, it’s possible your home IP address changed. That’ll happen once in a while. Find your new IP address and go into the Squid config to update the allowed IP address to your new one. Restart Squid and see if that’s the issue. If not, you’ll have to Google around, it could be a lot of things, sorry to say.
If the BBC still says you’re not allowed to watch stuff
It’s possible your IP address is on a list somewhere. Maybe try a new one by repeating step 3(b) above. Or, try an entirely new provider, if you can.
Final thoughts
Living in Hollywood I’ve met plenty of producers and actors and grips and audio engineers and PAs and union guys who unload the trucks and everyone in between, but I’ve never met anyone who works in entertainment who enjoys or supports withholding their product from potential viewers just because they’re in another location. So I’m fairly certain regional blackouts are another exploitative tool used by executives who don’t need to work for a living so they can further enrich themselves rather than creating things. So I don’t have any ethical hold-ups in circumventing these regional blackouts, and I hope you don’t either.
Happy streaming ✊